Creating the perfect birthday atmosphere is all about those special touches that transform an ordinary space into a magical celebration. Whether you’re planning an intimate gathering or a grand party, the right decorations can elevate the entire experience.
Here are 15 breathtaking birthday decoration ideas that will inspire your next celebration, complete with AI image prompts to help you visualize each concept!
1. Balloon Ceiling Canopy

Transform your ceiling into a floating wonderland with a balloon canopy that creates an intimate, festive atmosphere beneath. This show-stopping decoration makes excellent use of vertical space while creating a cozy, enclosed feeling that guests will remember long after the celebration ends.
How to create it: Select balloons in 3-4 complementary colors that match your theme (pastels work beautifully together, as do metallics with one pop color). Purchase balloons in various sizes from 5″ to 24″ for dimensional interest. Inflate them with helium or air, depending on your desired effect. For a fuller look, aim for at least 100-150 balloons for a standard room.
Attach balloons to clear fishing line or thin ribbon at staggered heights, then secure these strands across your ceiling in a grid pattern approximately 12″ apart. Add warm white LED fairy lights between the balloons by weaving them through your grid. For added dimension, incorporate some balloon clusters with 3-5 balloons tied together at different heights.
Materials needed: Balloons in various sizes (100-150 minimum), fishing line or thin ribbon, clear tape or removable hooks, balloon pump, step ladder, battery-operated fairy lights.
Perfect for: Indoor celebrations in spaces with lower ceilings, particularly dining areas where guests will be seated beneath the display. This works wonderfully for milestone birthdays, baby showers, or any event where you want to create an intimate, magical atmosphere.
2. Personalized Photo Timeline Wall
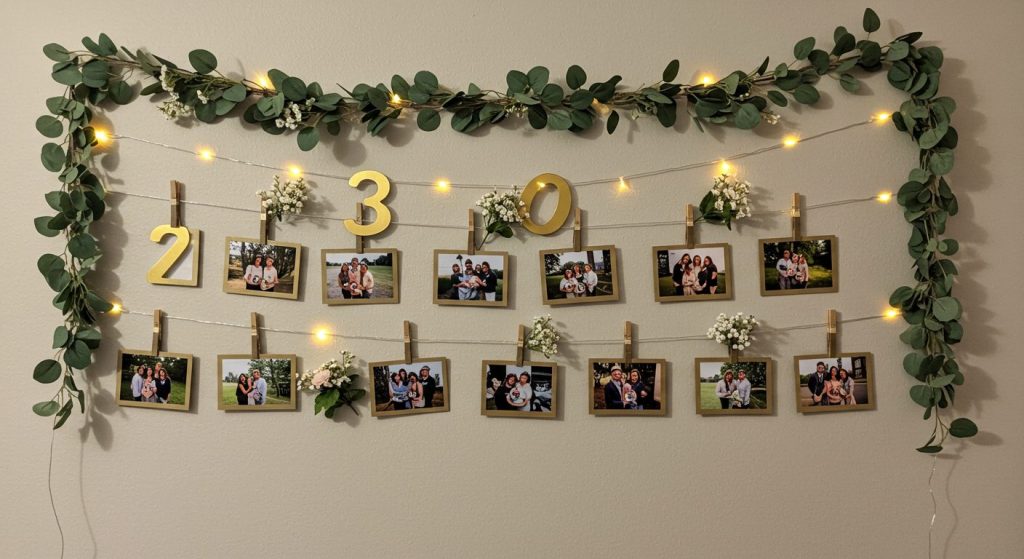
Create a stunning visual journey through the birthday person’s life with a chronological display of photos. This heartwarming decoration doubles as entertainment as guests spend time reminiscing over memories while appreciating how much the celebrant has grown and changed over the years.
How to create it: Collect 15-25 meaningful photos representing different ages and milestones in the birthday person’s life. For best visual impact, edit photos to have a consistent style—either all color, all black and white, or a cohesive filter. Print photos in a uniform size (5×7″ or 8×10″) for a clean look, or vary sizes slightly for a more eclectic approach.
Mount photos on sturdy cardstock or foam board backing for a professional appearance. Create elegant number markers for ages or years using gold cardstock, wooden numbers, or 3D printed numbers.
Arrange photos chronologically along a visible clothesline with mini clothespins, on a dedicated wall space with removable mounting putty, or on a large display board covered in complementary fabric. Add small handwritten captions beneath each photo with dates, locations, or funny anecdotes. Enhance the display by weaving battery-operated fairy lights throughout and adding small decorative elements like paper flowers, greenery springs, or small trinkets that represent the birthday person’s interests between photos.
Materials needed: 15-25 photos spanning the birthday person’s life, printing supplies, mounting materials, decorative number markers, string or ribbon, mini clothespins or mounting putty, decorative elements, battery-operated lights, optional frame or display board.
Perfect for: Milestone birthdays like 21st, 30th, or 50th celebrations where reflection and nostalgia add emotional depth to the party. This decoration is particularly meaningful for family gatherings where multiple generations can share stories about the photos.
3. Tropical Paradise Theme
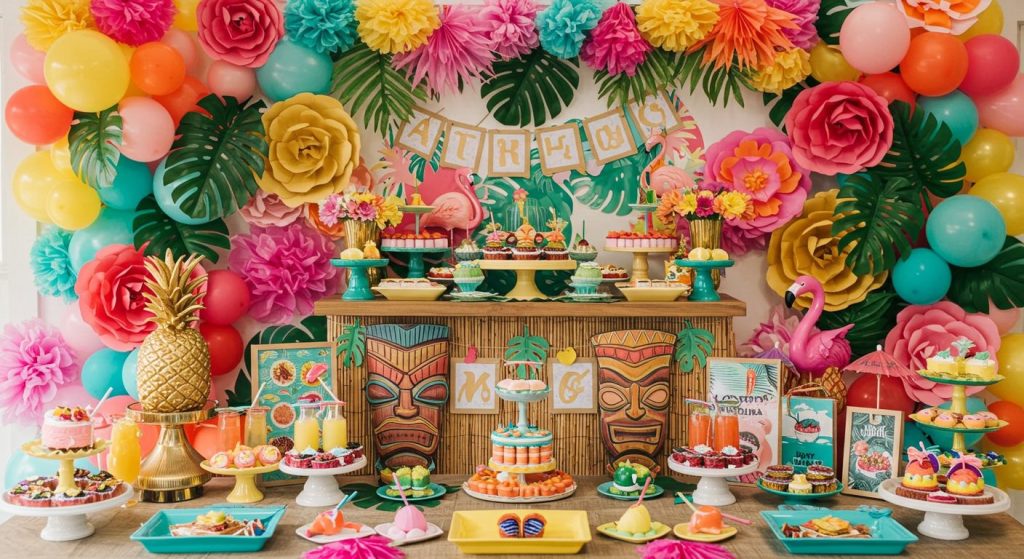
Bring vacation vibes to your celebration with lush tropical decorations regardless of season or location. This vibrant, transportive theme instantly creates a relaxed, festive atmosphere that encourages guests to unwind and enjoy. The bold colors and natural elements provide countless opportunities for Instagram-worthy moments.
How to create it: Start with a color palette featuring vibrant greens, hot pinks, bright oranges, and sunny yellows, with touches of gold for sophistication. Create a lush backdrop by attaching real or artificial palm leaves, monstera leaves, and fern fronds to walls or standing screens—overlap them densely for an authentic jungle feel. Supplement with paper tropical flowers in 12-18″ diameters for dramatic effect. Position 3-5 potted tropical plants like bird of paradise or palms throughout the space.
Add character with flamingo figures of varying heights (both the traditional pink and some gold ones for elegance), gold pineapple decorations, and coconut accents. Create height variation with tall tiki torches or bamboo poles wrapped with fairy lights. Set up a dedicated tropical drink station with fresh fruits, colorful paper umbrellas, and bamboo serving accessories.
Use banana leaf pattern runners or placemats for tables. Scatter seashells and faux hibiscus flowers across surfaces. Hang colorful paper lanterns or string lights overhead in a canopy effect. For an immersive experience, play gentle ocean sounds or tropical music in the background.
Materials needed: Tropical foliage (real or artificial), large paper flowers, flamingo decorations, pineapple accents, tiki torches, string lights, tropical-patterned textiles, bamboo elements, colorful serving ware, paper umbrellas and straws, tropical fruits for garnish.
Perfect for: Summer birthdays when you can extend the party outdoors, winter celebrations when guests need a warm mental escape, or anytime you want to create a festive, relaxed atmosphere that feels like a vacation. This theme works especially well for adults who need a break from everyday stress.
4. Paper Flower Backdrop
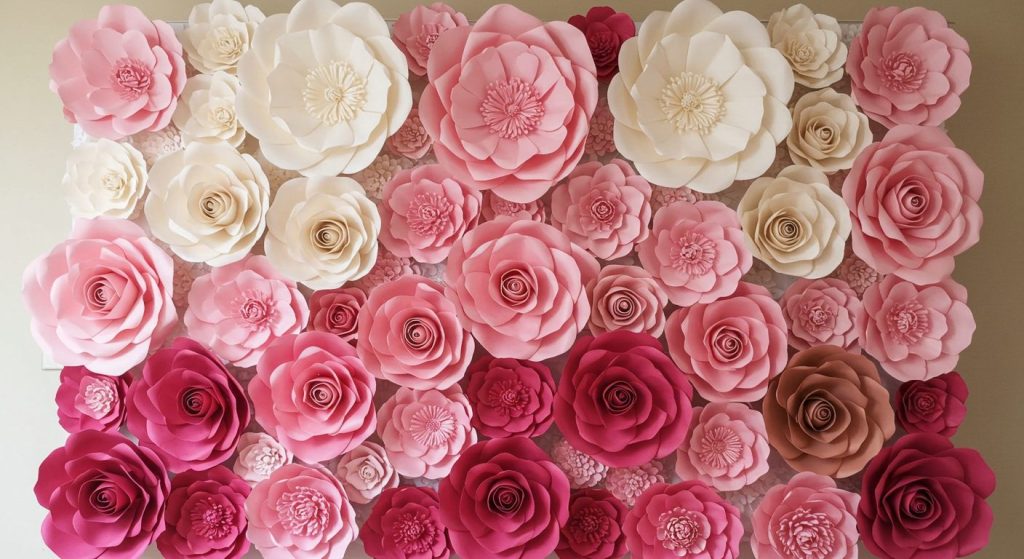
Create a stunning focal point with an oversized paper flower wall that makes for perfect photo opportunities. This versatile decoration can be customized to any color scheme and creates dramatic visual impact with relatively affordable materials. The dimensional, handcrafted quality adds an artistic element that elevates the entire celebration.
How to create it: Choose a color palette of 4-5 complementary colors (consider an ombré effect from light to dark for sophisticated visual appeal). Purchase or prepare heavyweight crepe paper, card stock, or coffee filters in your chosen colors. Research different paper flower techniques to create variety—giant peonies, roses, dahlias, and abstract blooms work beautifully together. Aim to create 20-30 flowers ranging from 8″ to 30″ in diameter for a standard 7’x7′ backdrop.
Work with at least 3 different flower templates to create natural variation. Build flowers with multiple layers for realistic dimension and fullness. Attach completed flowers to a portable backdrop structure like a pegboard, foam core panels, or directly to a wall using removable mounting putty or command strips.
Arrange flowers in an organic, asymmetrical pattern, clustering some together while allowing others to stand alone. For added dimension, incorporate paper leaves in 2-3 shades of green between some flowers. Consider adding subtle touches of metallic paper for sparkle, or small battery-operated fairy lights woven through the arrangement for evening events.
Materials needed: Crepe paper or card stock in chosen colors, scissors, glue gun and glue sticks, wire or wooden skewers for stems, backdrop base (pegboard, foam core, or wall space), mounting supplies, optional fairy lights.
Perfect for: Photo areas where guests can take memorable pictures, behind the cake table to make dessert presentations more spectacular, or as a statement wall in the main celebration area. This decoration is particularly effective for quinceañeras, sweet sixteen parties, bridal showers, or any event where photography is a priority.
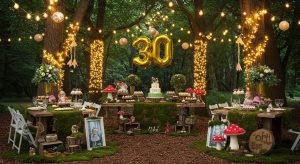
5. Enchanted Garden Party
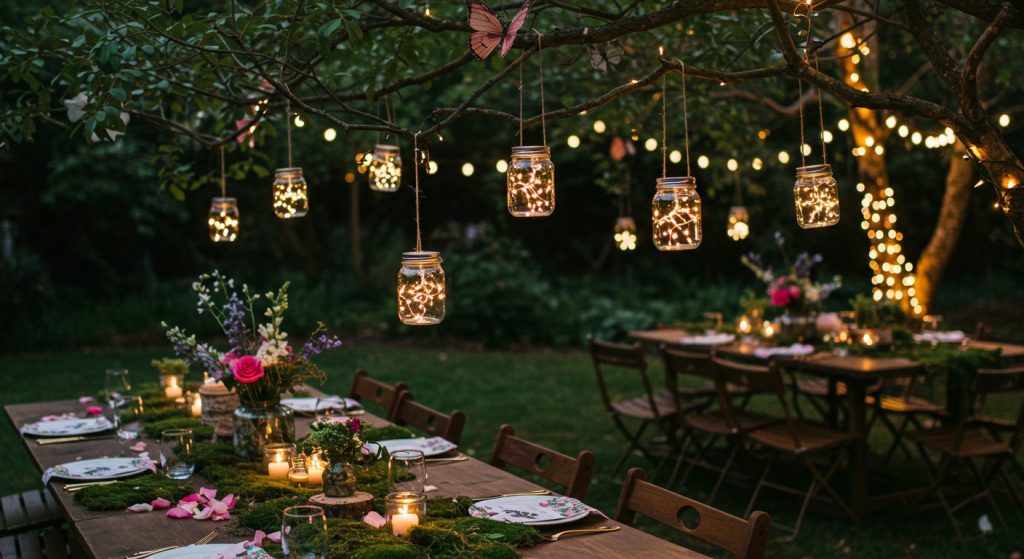
Transform your space into a whimsical garden oasis with natural elements and magical touches. This theme creates a serene yet festive atmosphere where every detail contributes to an immersive experience. The combination of natural materials with twinkling lights creates a fairytale ambiance that appeals to guests of all ages.
How to create it: Begin by incorporating abundant greenery throughout your space—eucalyptus garlands, fern fronds, ivy, and moss create the foundation. Layer in fresh or high-quality silk flowers in complementary colors, focusing on romantic varieties like garden roses, peonies, ranunculus, and delphinium for a lush, cottage garden feel. Create magical lighting with multiple light sources: string copper fairy lights through greenery, place glass lanterns with LED candles along pathways, position uplights behind larger plants for dramatic shadows, and hang mason jars with tea lights from tree branches or shepherd’s hooks.
Add whimsical elements like delicate butterfly decorations in complementary colors, small decorative bird nests, painted toadstools, or miniature fairy doors hidden among decorations. Create a canopy effect using sheer fabric draped from ceiling to walls with ivy or string lights intertwined. For table settings, use moss runners down table centers with scattered fresh flower heads and LED tea lights nestled among them. Incorporate height variation with tree branches in tall vases, potted plants of different heights, or suspended elements from the ceiling.
Add special touches like flower-filled watering cans, vintage birdcages with flower arrangements inside, and garden gnomes peeking out from unexpected places.
Materials needed: Various types of greenery and flowers (fresh or silk), fairy lights, lanterns, LED candles, moss, decorative butterflies, sheer fabric, garden-themed accessories, vintage vessels for flowers, shepherd’s hooks or hanging mechanisms.
Perfect for: Outdoor celebrations in garden settings, bringing nature indoors during inclement weather, spring or summer birthdays, or celebrations for nature lovers. This theme creates a particularly special atmosphere for milestone birthdays where a touch of magic is desired.
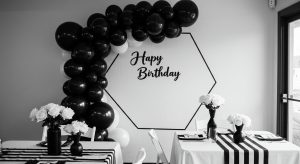
6. Glamorous Metallic Theme
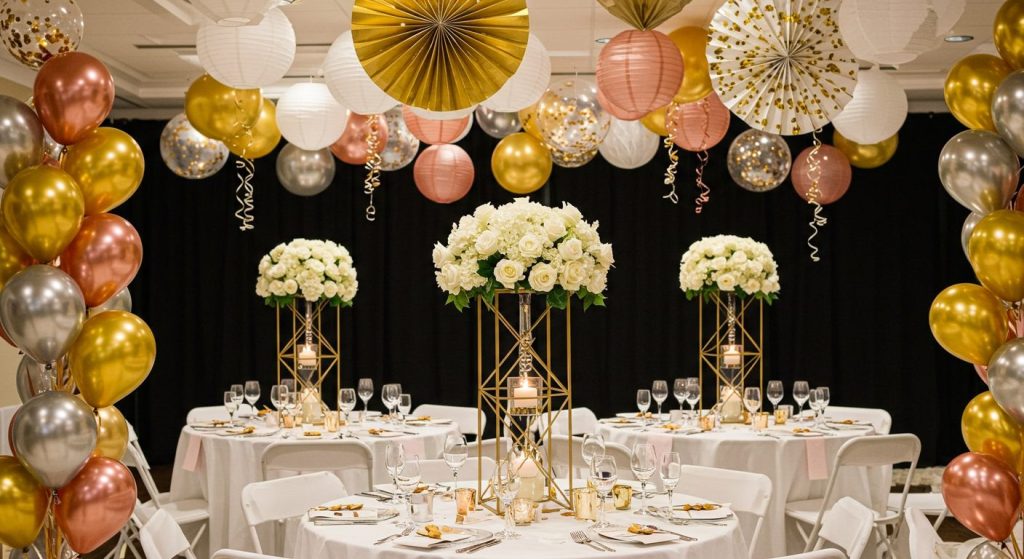
Create a sophisticated celebration with shimmering metallics that catch the light beautifully and add undeniable luxury to your event. This versatile theme can be adapted to feel modern and sleek or warm and opulent, depending on your styling approach. The reflective qualities of metallic elements amplify your lighting and create a festive atmosphere perfect for evening celebrations.
How to create it: Select a primary metallic tone (gold, silver, rose gold, or copper) and use it for 60% of your metallic elements, with the remaining 40% as accent metallics. Create dramatic balloon installations using chrome or metallic finished balloons in varying sizes from 5″ to 36″, arranged in organic clusters or geometric patterns.
For table settings, incorporate metallic chargers or placemats, metallic-rimmed glassware, and flatware in your chosen metallic finish. Create centerpieces using metallic vases or candle holders at various heights (3″, 8″, and 12″ tall pieces create visual interest), filled with monochromatic flowers for modern elegance.
Add metallic table runners or overlays to catch and reflect light across the table. For the backdrop, create a statement wall using metallic fringe curtains, a geometric metal frame installation with flowers, or a sequin backdrop in your primary metallic tone. Hang metallic paper lanterns, disco balls, or geometric pendant lights overhead to draw the eye upward.
Accent with clear glass or crystal elements that will catch and refract light from your metallic surfaces. Consider metallic-dipped feathers in tall arrangements for added texture and movement. For cake and dessert displays, incorporate metallic cake stands at various heights, metallic-foiled chocolates, and desserts with edible metallic elements.
Materials needed: Metallic balloons, table linens with metallic elements, metallic vases and containers, metal or metallic-painted geometric shapes, metallic fringe curtains or backdrops, metallic paper goods, reflective serving pieces, string lights or candles for illuminating metallic surfaces.
Perfect for: Adult birthdays where sophistication is key, evening celebrations where lighting can maximize the reflective qualities, milestone events that call for a touch of luxury, or winter celebrations where the warmth of metallics creates a cozy yet festive atmosphere.
7. Dessert Wall Display
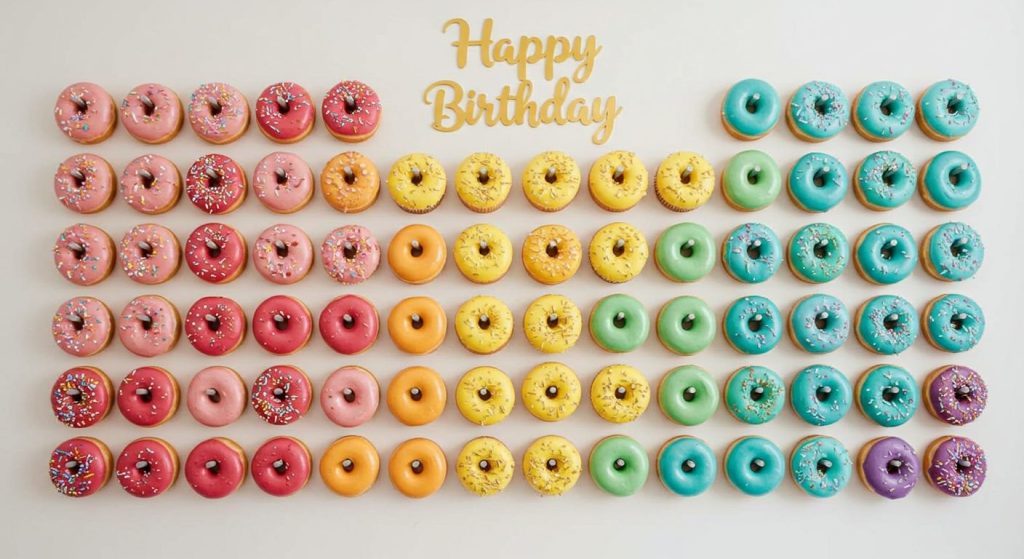
Create an interactive, eye-catching decoration that doubles as refreshments with a wall of sweet treats. This innovative approach serves both as a stunning visual focal point and functional food service, encouraging guests to interact with the decor while satisfying their sweet tooth. The versatility of design options makes this adaptable to virtually any party theme or color scheme.
How to create it: Begin with a sturdy backing structure—a large foam core board, wooden pallet, or purpose-built pegboard works well. Size should be approximately 4’x6′ for visual impact without overwhelming the space. Paint or cover your backing in a complementary color that makes your desserts pop—white, black, or a color from your party palette. Plan your layout based on the types of treats you’ll display: for donuts, insert wooden dowels at a slight upward angle; for cupcakes, attach sturdy food-safe shelves or individual cupcake holders; for cookies or macarons, create small ledges or clips.
Organize your treats in a visually pleasing pattern—consider color gradients (rainbow effect or ombré), geometric shapes, letters, or numbers relevant to the celebration. Allow approximately 30-40% of the board to remain empty for visual breathing room and aesthetic appeal. Incorporate the birthday person’s name, age, or a celebratory phrase using dimensional letters above, below, or integrated into the design.
Add dimension with small fresh flowers, greenery, or metallic embellishments between treat sections. Position your dessert wall near a solid-colored backdrop for maximum visual impact in photos. Illuminate with small LED spotlights for evening events to highlight the colors and textures of the treats. Include decorative signs indicating flavors or types of desserts, especially if accommodating dietary restrictions.
Materials needed: Backing structure (foam core, wood, or pegboard), paint or covering material, mounting hardware appropriate for your chosen treats, dessert items (donuts, cupcakes, cookies, macarons, cake pops, etc.), decorative elements, lettering or signage, lighting.
Perfect for: Sweet-themed parties, celebrations where you want to minimize table space used for desserts, events where a dramatic focal point is desired, or parties where interactive elements are prioritized. This works especially well for teen birthdays, milestone celebrations, or any event where social media-worthy moments are valued.
8. Suspended Floral Installations
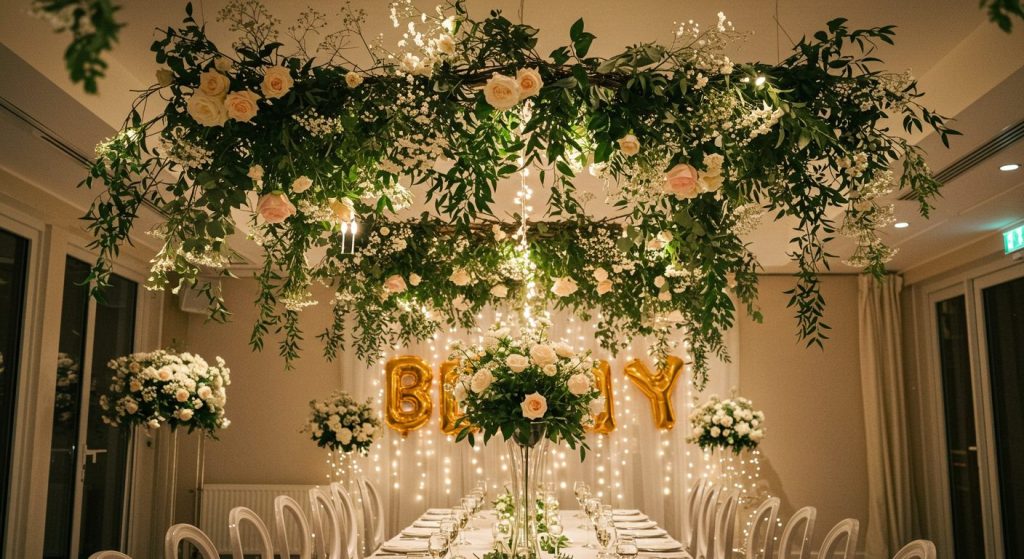
Create breathtaking overhead decorations that draw the eye upward and transform the entire space with dramatic floral elements that seem to float in mid-air. These installations create an immersive environment by utilizing often-overlooked ceiling space, allowing floor space to remain open for guests while still creating a lush, decorated atmosphere. The flexibility of design allows these to be adapted to any theme, from romantic and garden-inspired to modern and geometric.
How to create it: Plan your installation based on your venue’s ceiling height and structure—hanging points must be secure and able to bear weight. For a linear table, create a suspended runner installation approximately 20″ wide and as long as your table, positioned 30-36″ above the tabletop. For a more organic feel, design 3-5 clustered installations of varying sizes (from 18″ to 36″ in diameter) throughout the space.
Choose a base structure—options include chicken wire molded into organic shapes, wooden hoops or frames, or metal geometric forms—that complements your theme. Secure your chosen greenery (eucalyptus, ivy, fern, etc.) to the structure first as your base layer, creating fullness and establishing the overall shape. Add focal flowers strategically throughout—roses, peonies, dahlias, and orchids work beautifully for elegance, while wildflowers create a more whimsical feel.
For a cohesive look, select flowers in 3-4 complementary colors that match your overall palette. Incorporate unexpected elements like hanging glass terrariums, suspended candles in glass holders, crystal prisms, or delicate paper butterflies for unique visual interest. Add warm ambient lighting with battery-operated fairy lights or LED candles woven throughout the installation.
For a dynamic effect, suspend some elements lower than others using clear fishing line, creating a cascading appearance. Consider seasonal elements—cherry blossoms and pastel blooms for spring, sunflowers and grasses for summer, rich-toned flowers and autumn leaves for fall, or evergreen boughs and pinecones for winter celebrations.
Materials needed: Floral base structure, various greenery, focal flowers (fresh or high-quality silk), fishing line or thin wire, hooks or attachment points for ceiling, wire cutters, floral wire, optional elements (hanging vessels, lights, decorative accents).
Perfect for: Creating a magical atmosphere in spaces with higher ceilings, particularly over dining tables, buffet stations, dance floors, or entry areas. These installations are especially impactful for milestone birthdays, sophisticated evening gatherings, or any celebration where an elegant, immersive atmosphere is desired.
9. Interactive Polaroid Station
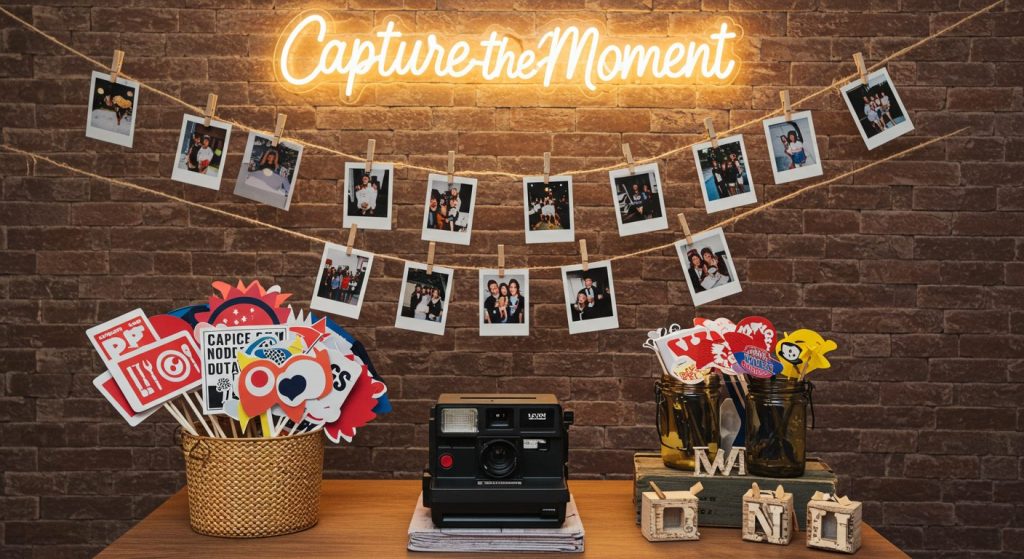
Create a decoration that builds throughout the event while capturing precious memories with a dedicated photo area that encourages guest participation. This interactive element serves multiple purposes—it entertains guests, documents the celebration in an authentic way, and creates a meaningful keepsake for the birthday person. The vintage-inspired aesthetic adds a touch of nostalgia that appeals across generations.
How to create it: Designate a well-lit corner of your venue (approximately 6’x6′ space) for your photo station. Set up a simple, attractive backdrop—a solid-colored wall, draped fabric, balloon arrangement, or botanical backdrop work beautifully. Position an instant camera on a stable surface with clear instructions for guests.
Include 2-3 packs of instant film (approximately 20-30 shots) depending on guest count. Create a small “props” station with 10-15 carefully curated items related to the birthday person’s interests, the celebration theme, or classic photo booth props like hats, glasses, and signs with phrases. For display, create a visually appealing arrangement area—string 3-5 rows of twine, thin rope, or fairy lights across a wall, frame, or folding screen. Place 20-30 small wooden clothespins or decorative clips along the strings for attaching photos.
Add a small sign with instructions like “Snap, Shake, Share” or “Capture a Memory for [Name].” Include colorful markers or metallic pens for guests to write messages or dates on the white borders of their photos. For an extra personal touch, create small cards where guests can write a birthday wish or memory to accompany their photo.
As the event progresses, the display fills with authentic moments, becoming a evolving decoration. Consider providing small albums, frames, or decorative boxes where the birthday person can store the photos as a keepsake after the celebration.
Materials needed: Instant camera (Polaroid, Fujifilm Instax, etc.), instant film (2-3 packs), display structure (string/twine and wall space, decorative frame, or screen), small clothespins or clips, photo booth props, markers, instructional signage, optional albums or storage containers.
Perfect for: Engaging guests and creating lasting mementos, particularly for milestone birthdays, gatherings with mixed age groups, or celebrations where not everyone knows each other well. This interactive element helps break the ice while creating a meaningful gift that continues to bring joy long after the party ends.
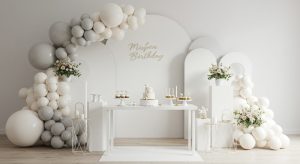
10. Monochromatic Color Scheme
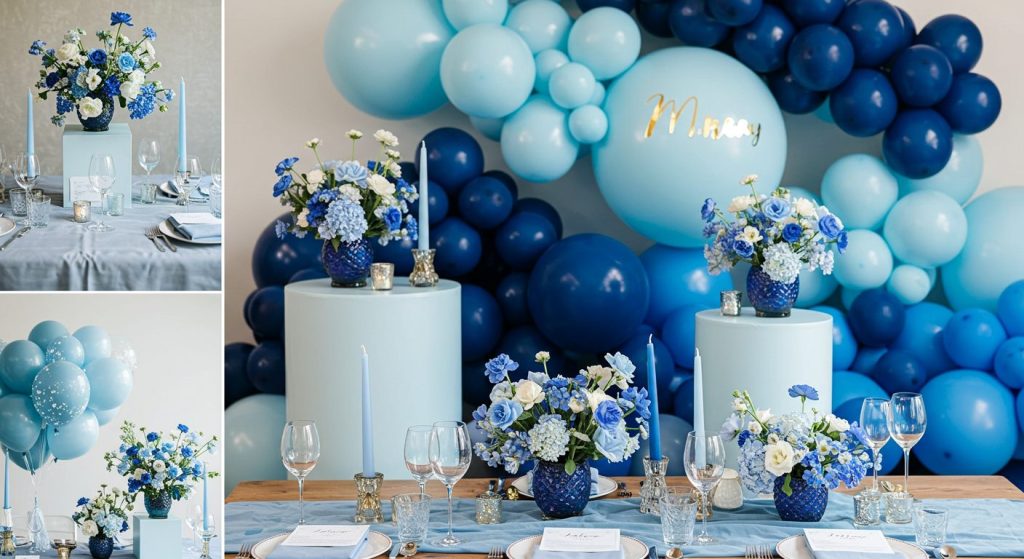
Create a visually striking, Instagram-worthy space using variations of a single color throughout all decorative elements. This sophisticated approach creates a cohesive, intentional aesthetic that photographs beautifully while making a bold statement. The unexpected limitation of a single color family actually highlights texture, form, and light in ways that multi-colored schemes cannot, resulting in a modern, artistic atmosphere.
How to create it: Select one main color that suits the birthday person’s preferences or the event’s theme—blues create a calm, serene atmosphere; pinks feel romantic and playful; greens bring natural, fresh energy; purples convey luxury and creativity.
Gather decorative elements in at least 7-10 different shades within your chosen color, from the palest tint to the deepest tone. Create depth by incorporating various textures and materials within your color family—matte, glossy, metallic, velvet, satin, paper, glass, and natural elements provide visual interest despite the limited palette. For balloon decorations, combine standard latex balloons with foil balloons in 3-4 different shades of your chosen color, arranged in organic arches or clusters.
Set tables with monochromatic layers—tablecloths in the deepest shade, runners or placemats in a middle tone, and napkins or place cards in the lightest shade. Select glassware that either matches your color scheme (colored glass) or contrasts with it (clear crystal for dramatic effect against bold colors).
Incorporate floral arrangements featuring flowers in 3-4 shades of your chosen color, mixed with greenery for subtle contrast. Add dimension with lighting elements—colored LED uplights can enhance your theme while creating dramatic shadows and highlights. For a sophisticated twist, incorporate one metallic accent (gold, silver, or rose gold) in small doses throughout to add elegance and help define shapes within your monochromatic scheme.
Materials needed: Decorative items in 7-10 shades of your chosen color, including balloons, table linens, paper goods, floral elements, serving pieces, backdrop materials, and lighting.
Perfect for: Creating a cohesive, modern aesthetic that photographs beautifully, particularly for design-conscious celebrations, milestone birthdays where a sophisticated approach is desired, or events where a strong visual impact is prioritized over traditional multicolored birthday decorations.
11. Personalized Neon Sign
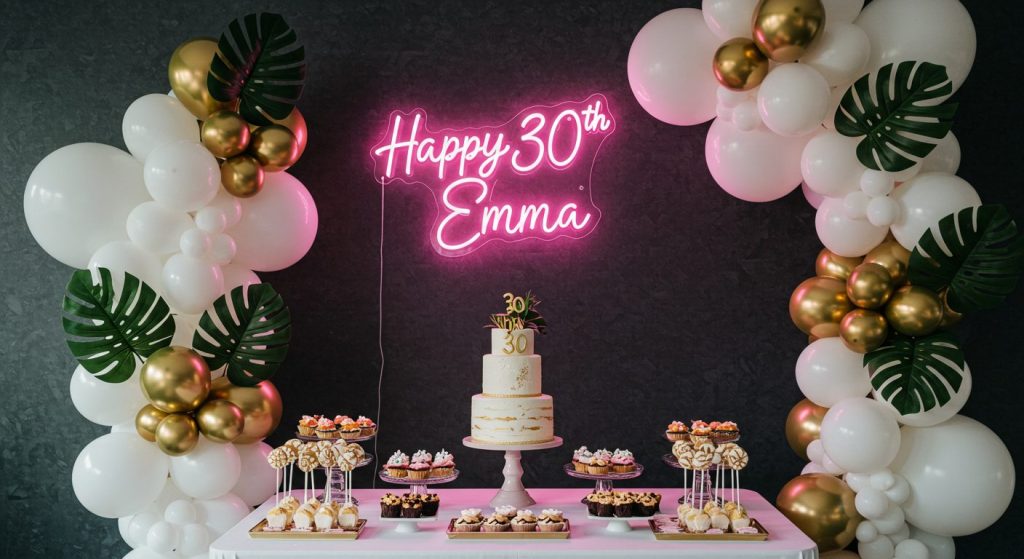
Create a modern, customized focal point that adds ambiance and personality with a glowing neon-style sign that makes a bold statement while providing atmospheric lighting. This contemporary decoration serves multiple purposes—it personalizes the space instantly, creates a designated photo opportunity, and adds a warm, inviting glow to the celebration. The customization possibilities make this especially meaningful for the birthday person.
How to create it: Determine your message—options include the birthday person’s name, age (for milestone birthdays), a meaningful phrase or inside joke, or a simple “Happy Birthday” in a distinctive font. Choose a color that complements your overall palette while ensuring good visibility—pink, blue, and warm white are popular choices that photograph well. For authentic neon, work with a professional neon artist to create a custom piece (typically requires 3-4 weeks lead time and proper electrical setup).
For more affordable and DIY-friendly options, consider LED neon-style signs that mimic the look of traditional neon but are safer, more portable, and often battery-operated. Size your sign appropriately for your space—for most home celebrations, 24-36″ wide signs create impact without overwhelming the space.
Plan your installation location carefully—mount against a contrasting wall color (dark walls make neon pop dramatically), within a balloon installation, or above a dessert or gift table for maximum impact. Create a complete vignette around your sign by incorporating complementary elements like balloon arrangements in colors that echo or contrast with the neon, potted plants for organic texture, or additional lighting elements like fairy lights or candles that enhance the glow.
For a cohesive look, incorporate small touches of your neon color throughout other party elements—signage, straws, napkins, or candles in matching hues tie the theme together.
Materials needed: Custom neon or LED neon-style sign, mounting hardware appropriate for your wall type, complementary decorative elements for creating a vignette, extension cords or batteries depending on power source.
Perfect for: Contemporary celebrations and creating a focal point for photos, particularly for teen or young adult birthdays, milestone celebrations where a personalized element adds meaning, or evening gatherings where the ambient lighting creates atmosphere. This decoration works especially well for events where social media sharing is anticipated.
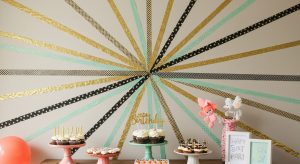
12. Tassel and Fringe Extravaganza

Create movement and texture with layers of tassels, fringes, and streamers that add dynamic energy to your celebration. This versatile decoration style brings playfulness and festivity to any space while offering endless customization possibilities. The dimensional quality and subtle movement create an immersive atmosphere that feels particularly celebratory and joyful.
How to create it: Select a color palette of 4-6 complementary colors that match your theme—consider including one metallic (gold or silver) for added sophistication. Create or purchase tissue paper tassels in three sizes (6″, 12″, and 18″) for variety—plan for approximately 5-7 tassels per linear foot of display space for a full, lush look. Supplement with metallic or mylar fringe curtains that catch the light and create dramatic movement.
For maximum impact, layer your elements at multiple heights and depths—hang some directly from the ceiling, others from a backdrop frame, and still others from table edges. Create a statement backdrop wall by attaching rows of tassels to a dowel or string, alternating colors and sizes for visual interest.
The bottom of each row should slightly overlap the top of the row below. For table decorations, create custom table skirts using alternating colors of fringe or tassels attached to the edge of the table.
Add dimension to balloon arrangements by incorporating tassels as hanging elements from balloon clusters. For an interactive element, create pull-string piñata-style tassels containing confetti or small treats that guests can pull throughout the celebration. Incorporate matching paper fans, honeycombs, or pom-poms among your tassels for added dimensional variety. For evening celebrations, position uplighting behind your tassel installations to create dramatic shadows and emphasize movement.
Materials needed: Tissue paper in chosen colors, metallic or mylar fringe curtains, string or fishing line, scissors, tape or glue, dowels or mounting supplies, optional paper fans or honeycomb balls, lighting elements.
Perfect for: Adding dimension and a festive feeling to any space, particularly for colorful celebrations, children’s birthdays where playfulness is key, or events with a bohemian or eclectic aesthetic. This decoration style works especially well when movement and texture are desired to create a joyful, energetic atmosphere.
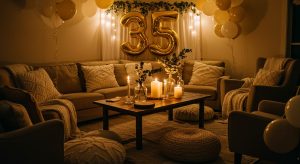
13. Starry Night Celebration
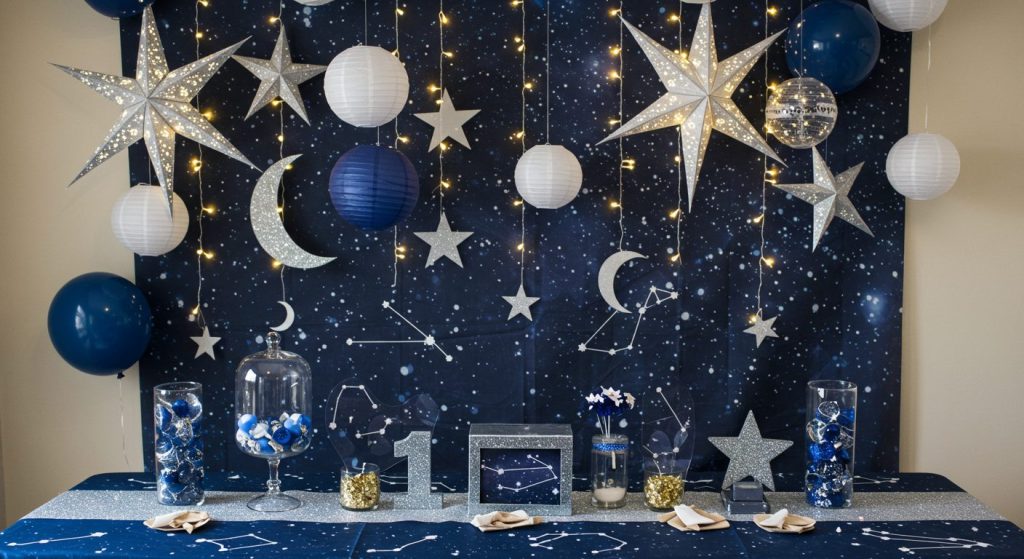
Transform your space into a celestial wonder with star-themed decorations that create an enchanting, magical atmosphere. This thematic approach taps into the universal wonder of the night sky, creating an environment that feels both vast and intimate simultaneously. The twinkling lights and metallic accents create a sophisticated yet whimsical ambiance perfect for evening celebrations.
How to create it: Begin with a deep blue, purple, or black color base throughout your space—dark tablecloths, wall coverings, or backdrop fabric establishes the night sky foundation. Create a twinkling star effect with multiple lighting elements: string 5-7 strands of warm white fairy lights across ceilings in a random pattern to mimic stars, hang star-shaped paper lanterns with LED lights inside at varying heights (8″, 12″, and 24″ diameter for dimensional variety), and position uplights strategically to create a gentle glow.
Incorporate celestial elements throughout your decorations—metallic gold and silver star garlands draped across tables or hanging from the ceiling, constellation patterns printed on table runners or napkins, moon and star-shaped serving platters or dessert plates.
For table centerpieces, create “celestial terrariums” using clear glass containers filled with battery-operated fairy lights, iridescent or metallic stars, and small mirror pieces to reflect light. Suspend paper stars (5-10 per square yard of ceiling space) at different heights using fishing line for a three-dimensional starry effect. Add scientific interest with constellation details—create custom constellation maps showing the night sky on the birthday person’s birth date, or highlight zodiac constellations relevant to their sign.
For an interactive element, set up a small telescope station where guests can observe the actual night sky. Incorporate glow-in-the-dark elements that create surprise effect when ambient lighting is dimmed. For food and beverages, serve star-shaped foods, galaxy-swirled desserts, or drinks with edible shimmer dust to tie into the celestial theme.
Materials needed: Dark blue, purple, or black backdrop materials and table linens, string lights, star-shaped lanterns and decorations, metallic star garlands, glass containers for centerpieces, fishing line, optional telescope or star projection lighting.
Perfect for: Evening celebrations or space-themed parties, particularly winter birthdays when early nightfall enhances the theme, milestone celebrations where a touch of magic is appropriate, or events for those with interest in astronomy, mythology, or fantasy. This theme creates an especially memorable atmosphere for both children and adults.
14. Vintage Carnival Theme
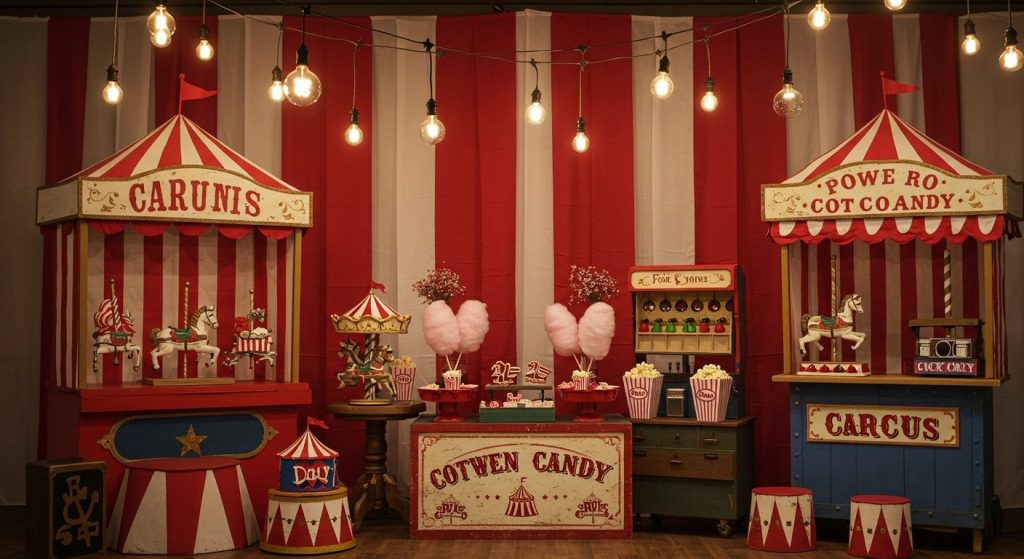
Bring the nostalgic joy of an old-fashioned carnival to your celebration with whimsical, interactive decorations that evoke the golden age of fairgrounds. This playful theme combines nostalgic elements with opportunities for guest engagement, creating a festive atmosphere filled with color, entertainment, and childlike wonder for guests of all ages.
How to create it: Establish the carnival aesthetic with distinctive color combinations—traditional red and white striped fabrics as table runners, backdrop elements, and bunting banners; accents of primary colors (blue, yellow) throughout. Create a proper entrance experience with a ticket booth facade (can be constructed from a large cardboard box) where guests receive their “admission tickets” (which can serve as drink tokens or game passes).
Illuminate the space with string lights featuring large, round bulbs suspended in a canopy pattern overhead, reminiscent of midway lighting. Set up 3-5 carnival game stations using simple materials—ring toss (bottles and embroidery hoops), ball toss (pyramids of cans), balloon darts (safely secured for younger guests), or a fishing game with prizes.
Create a prize redemption station with inexpensive trinkets and candy displayed in glass jars. For food service, incorporate traditional carnival elements—set up a popcorn machine with striped popcorn boxes, a cotton candy station with paper cones, or a hot dog roller with classic paper trays.
For centerpieces, use vintage carousel elements, miniature ferris wheels, or classic circus animals displayed under small glass cloches or bell jars. Add authentic touches with hand-painted wooden signs featuring old-fashioned typography announcing “Games,” “Prizes,” or “Refreshments.” Incorporate vintage carnival tickets into garlands or table scatters. For larger spaces, create Instagram-worthy photo opportunities with cutout facades where guests can pose as strongmen or carnival performers. Add carnival music playing softly in the background for complete immersion in the theme.
Materials needed: Red and white striped fabric, string lights with large bulbs, materials for simple carnival games, prize trinkets, vintage-style signage, carnival food serving equipment and containers, carousel or circus-themed decorative elements.
Perfect for: Fun-focused celebrations for all ages, particularly for those who enjoy interactive elements, nostalgia, or playful environments. This theme works especially well for family celebrations where multiple generations will attend, or for those who appreciate vintage aesthetics with a playful twist.
15. Book Page Decorations
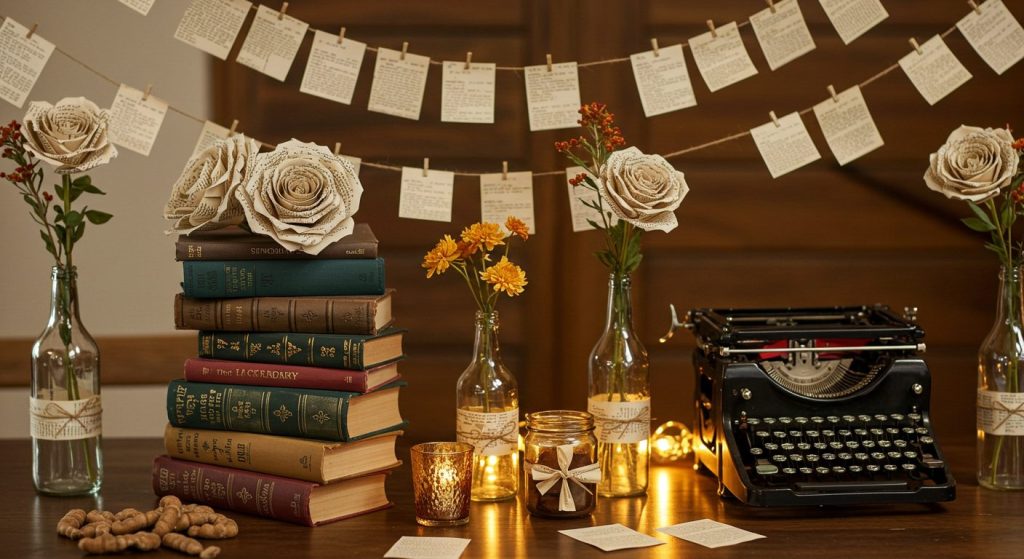
Create sophisticated, literary-inspired decorations perfect for book lovers with elements crafted from book pages that add texture, nostalgia, and personality to your celebration. This unique approach combines craftsmanship with sentimentality, creating a thoughtful atmosphere with depth and character. The neutral palette of book pages allows for versatile styling while the literary connection adds meaningful context for those who appreciate the written word.
How to create it: Source materials ethically—use damaged books beyond repair, inexpensive used books with no collectible value, or printed book page-patterned paper for a similar effect without using actual books. Create a stunning backdrop using book pages in a variety of techniques—fold pages into geometric shapes and mount in a pattern, create a wall of open books attached to a backing board, or cut thousands of 2″ circles from pages and sew them together into a textured curtain.
Craft dimensional paper flowers (roses and peonies work particularly well) from book pages in various sizes from 3″ to 8″ in diameter—arrange in vintage vessels like teacups, ink bottles, or weathered leather-bound books as centerpieces. Create table runners by overlapping book pages in an organic pattern down the center of tables. For place cards, fold small origami elements from book pages and write guest names with a calligraphy pen.
Hang garlands made from triangular bunting cut from book pages, interspersed with small fairy lights for evening ambiance. Create dimension by incorporating vintage elements that complement the literary theme—old typewriters with a personalized birthday message inserted, stacks of leather-bound books as platforms for candles or desserts, antiqued library card catalog drawers holding cutlery or party favors.
Add touches of nature with pressed flowers or botanical elements between pages of open books. For a personalized touch, select pages from books that have special meaning to the birthday person—their favorite novels, poetry that resonates with them, or books reflecting their interests. Incorporate quotes about books, reading, or wisdom beautifully hand-lettered on signs throughout the space.
Materials needed: Used books or book page-patterned paper, scissors, glue, string or twine, vintage vessels and accessories, calligraphy pens, optional pressed botanical elements, vintage typewriter or library elements if available.
Perfect for: Bookworms, vintage lovers, or literary-themed celebrations, particularly for writers, teachers, librarians, or anyone with a love of literature. This theme creates an especially meaningful atmosphere for milestone birthdays where reflection and personal connection are valued, or for gatherings where intellectual conversation is encouraged.
Conclusion: Creating Unforgettable Birthday Moments Through Thoughtful Decoration
The perfect birthday decoration is more than just aesthetic appeal—it’s about creating an immersive atmosphere that celebrates the unique personality of the birthday person while providing a memorable experience for everyone involved. Each of these 15 ideas offers a distinctive approach to transformation, whether through dramatic ceiling installations that redefine the space, interactive elements that engage guests throughout the celebration, or personalized touches that make the birthday person feel truly special.
When selecting decorations for your next birthday celebration, consider how different elements work together to create a cohesive experience. The most successful birthday environments combine visual impact with thoughtful details, providing both spectacular photo opportunities and intimate moments of discovery. Consider incorporating multiple sensory elements—not just visual appeal, but also subtle fragrance from fresh flowers, textural elements that invite touch, and ambient lighting that evolves as day transitions to evening.
Remember that the most meaningful decorations often reflect something personal about the birthday celebrant—their favorite colors, interests, memories, or dreams for the future. Taking time to incorporate these elements transforms standard decorations into a deeply personal expression of appreciation for the person being celebrated.
While these 15 ideas provide comprehensive inspiration, don’t be afraid to combine elements from different concepts or adapt them to suit your specific space, budget, or theme. The joy of decoration lies in the creative process itself—planning, crafting, and arranging elements that will bring smiles and create lasting memories.
As you prepare for your next birthday celebration, approach decoration as an opportunity to create not just a beautiful space, but a meaningful experience that honors the person celebrating another year of life. With thoughtful planning and creative execution, your birthday decorations will create an atmosphere where joy, connection, and celebration naturally flourish.
Happy decorating, and may your next birthday celebration be truly unforgettable!